


How to use Burmese curly bundles to create glueless lace wigs

Stage 1: Preparing Materials
Having the right tools and materials is crucial for success.
You'll need:
Burmese curly bundles: You typically need 3-4 bundles to create a fuller effect. Curly hair requires more volume.
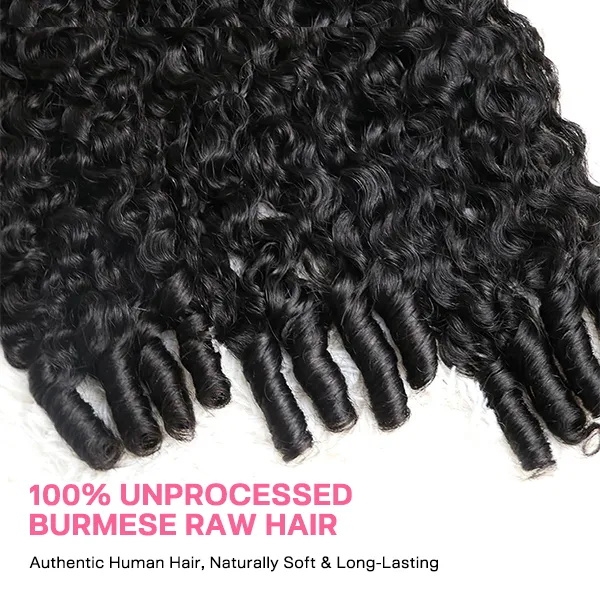
Hair Type: Make sure it's 100% virgin Burmese hair. This type of hair can be permed and dyed, and lasts longer. Its intact cuticles help prevent tangles, a common problem with curly hair.
Lace Wig Cap:
Type: Choose a Swiss lace or French lace cap that matches your skin tone. Swiss lace is thinner and more invisible, while French lace is more durable.
Construction: For glueless lace wigs, it's best to choose a cap with an adjustable buckle, a comb, and an elastic back strap. Many pre-made caps have these features.
Tools:
Wig Form: A stable form with clips is best.
T-pins: Used to secure the mesh cap to the headpiece.
Air comb/wide-tooth comb: Used to gently detangle hair.
Needle and thread: Used for crocheting hair. Use thread that's a similar color to your hair.
Scissors.
Hairspray or strong-hold gel (optional): Used to control small hair breaks and the hairline, but the wig itself is glue-free.
Crochet hook: Use a standard 0.75mm or 0.6mm hook.
Styling and securing:
Wig securing tape/anti-slip silicone strip (optional but highly recommended): A velvet or silicone strip that can be wrapped around your head to prevent the wig from sliding.
Hair cap: Used to hold your own hair flat.
Phase 2: The Making Process
Step 1: Prepare the Wig Mesh Cap
Use T-pins to secure the mesh cap firmly to the wig headpiece, ensuring it lies flat and wrinkle-free. This is your canvas.
Customizing the Mesh Cap (Optional but Recommended): If your mesh cap is a basic one, you can sew in two to three wig combs (on the forehead and sides) and an elastic back strap. This is key to achieving a truly glue-free and secure fit.
Step 2: Determine the Parting Line and Bleach the Roots (Critical Step)
This step should be done before sewing the hair.
Decide on your desired parting (center, side, or no parting).
On the inside of the mesh cap, place a sponge or use the support posts from the headform under the lace in the parting area. This will create a sturdy surface.
Mix bleaching powder and hydrogen peroxide (20% bleach) with a small amount of shampoo or essential oil to form a paste.
Carefully apply this mixture only to the root nodes, inside the lace in the parting area.
Wait 15-25 minutes, checking frequently. The goal is to lighten the root nodes to match your scalp color and make them invisible.
Once the color has been lightened, carefully rinse the bleach off and allow the cap to dry completely.
Step 3: Sew the hair strands to the cap
This is the most time-consuming part.
Start at the bottom: Starting with the first strand of hair, sew along the very bottom edge of the cap, above the elastic back band. Use a secure double-stranded thread and backstitch or overlock stitch.
Sew upwards: Sew the next strand of hair just above the previous strand, making sure it covers the stitching of the previous strand. Repeat this process until you reach the crown of your head.
Leave the top/parting area: Do not sew hair in the area where you want the parting to remain. This area will be hand-woven for the most natural effect.
Step 4: Hand-crochet (Filling the parting area)
This part requires patience, but the results are worth it.
Using a crochet hook, hand-crochet one or more strands of hair from the Burmese hair strands onto the lace in the parting area.
This creates the most realistic, scalp-like effect. You can create a center part, a side part, or a full frontal part, if desired.
Step 5: Final Style and Wear
Comb Carefully: Use a wide-tooth comb or your fingers to slowly comb upwards from the ends to detangle. Avoid combing directly from the crown, as this will ruin the curl.
Having the right tools and materials is crucial for success.
You'll need:
Burmese curly bundles: You typically need 3-4 bundles to create a fuller effect. Curly hair requires more volume.
Hair Type: Make sure it's 100% virgin Burmese hair. This type of hair can be permed and dyed, and lasts longer. Its intact cuticles help prevent tangles, a common problem with curly hair.
Lace Wig Cap:
Type: Choose a Swiss lace or French lace cap that matches your skin tone. Swiss lace is thinner and more invisible, while French lace is more durable.
Construction: For glueless lace wigs, it's best to choose a cap with an adjustable buckle, a comb, and an elastic back strap. Many pre-made caps have these features.
Tools:
Wig Form: A stable form with clips is best.
T-pins: Used to secure the mesh cap to the headpiece.
Air comb/wide-tooth comb: Used to gently detangle hair.
Needle and thread: Used for crocheting hair. Use thread that's a similar color to your hair.
Scissors.
Hairspray or strong-hold gel (optional): Used to control small hair breaks and the hairline, but the wig itself is glue-free.
Crochet hook: Use a standard 0.75mm or 0.6mm hook.
Styling and securing:
Wig securing tape/anti-slip silicone strip (optional but highly recommended): A velvet or silicone strip that can be wrapped around your head to prevent the wig from sliding.
Hair cap: Used to hold your own hair flat.
Phase 2: The Making Process
Step 1: Prepare the Wig Mesh Cap
Use T-pins to secure the mesh cap firmly to the wig headpiece, ensuring it lies flat and wrinkle-free. This is your canvas.
Customizing the Mesh Cap (Optional but Recommended): If your mesh cap is a basic one, you can sew in two to three wig combs (on the forehead and sides) and an elastic back strap. This is key to achieving a truly glue-free and secure fit.
Step 2: Determine the Parting Line and Bleach the Roots (Critical Step)
This step should be done before sewing the hair.
Decide on your desired parting (center, side, or no parting).
On the inside of the mesh cap, place a sponge or use the support posts from the headform under the lace in the parting area. This will create a sturdy surface.
Mix bleaching powder and hydrogen peroxide (20% bleach) with a small amount of shampoo or essential oil to form a paste.
Carefully apply this mixture only to the root nodes, inside the lace in the parting area.
Wait 15-25 minutes, checking frequently. The goal is to lighten the root nodes to match your scalp color and make them invisible.
Once the color has been lightened, carefully rinse the bleach off and allow the cap to dry completely.
Step 3: Sew the hair strands to the cap
This is the most time-consuming part.
Start at the bottom: Starting with the first strand of hair, sew along the very bottom edge of the cap, above the elastic back band. Use a secure double-stranded thread and backstitch or overlock stitch.
Sew upwards: Sew the next strand of hair just above the previous strand, making sure it covers the stitching of the previous strand. Repeat this process until you reach the crown of your head.
Leave the top/parting area: Do not sew hair in the area where you want the parting to remain. This area will be hand-woven for the most natural effect.
Step 4: Hand-crochet (Filling the parting area)
This part requires patience, but the results are worth it.
Using a crochet hook, hand-crochet one or more strands of hair from the Burmese hair strands onto the lace in the parting area.
This creates the most realistic, scalp-like effect. You can create a center part, a side part, or a full frontal part, if desired.
Step 5: Final Style and Wear
Comb Carefully: Use a wide-tooth comb or your fingers to slowly comb upwards from the ends to detangle. Avoid combing directly from the crown, as this will ruin the curl.
Share this post
Naijanetwork Forum Statistics
Threads: 36819,
Posts: 47209,
Members: 20169