


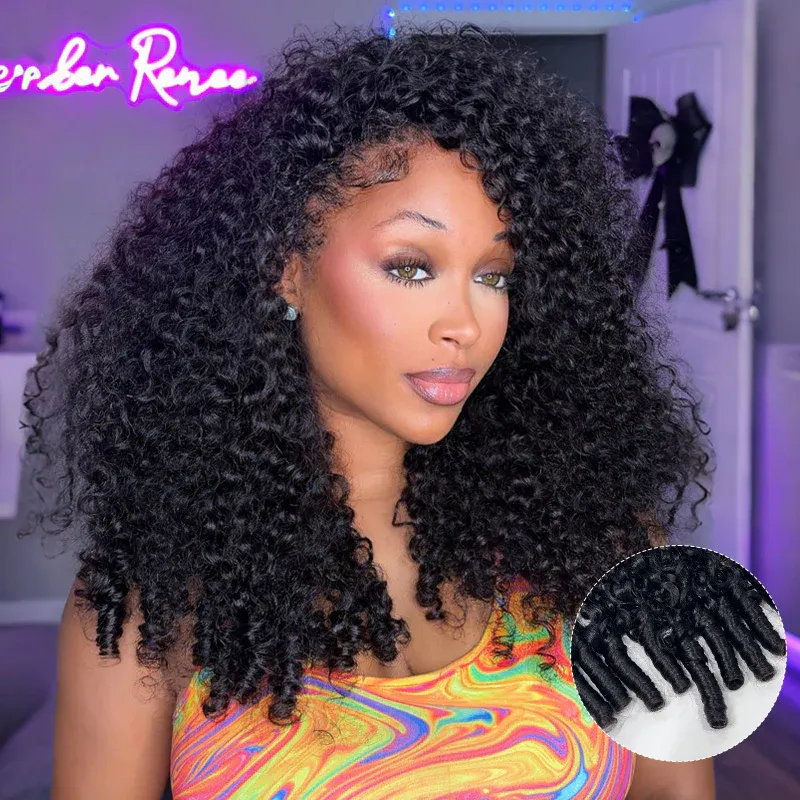
How to Put On a Wig with Long Hair

Let’s keep it real, queens—rocking a wig when your natural hair is long can feel like a total struggle at first. I’ve been there! Tangles, lumps, that weird “helmet head” vibe that screams wig alert? I’ve dealt with all of it, especially when I’m trying to slay my kinky curly half wigs or my luxe burmese curly half wig for a night out. But guess what? It’s all about the prep—no fancy stylist, no crazy tools, just a few simple hacks that make long hair lay flat and your wig look 100% natural. This step-by-step is foolproof, I promise. I use it every single time, and now my installs are seamless, quick, and zero stress. Let’s dive in!
Step 1: Detangle & Prep Your Long Hair—No Skipping This!
First things first: get rid of all tangles. Grab a wide-tooth comb and run it from the ends up—yankin’ from the roots is a one-way ticket to breakage, and we don’t do that here. Once your hair’s smooth, spritz a little leave-in conditioner if it’s dry. My natural hair is long and thick, so this step keeps it from frizzing up under the wig cap—total game-changer.
Step 2: Choose Your Style—Buns or Braids? Pick What’s Comfy
Long hair needs to be flattened, not just pulled back. You’ve got two easy options, and I switch between ’em depending on how much time I have:
Low Sock Buns (my go-to): Split your hair into two low pigtails, twist each into a tight bun, and tuck the ends under. Use bobby pins to lock ’em in—make sure the buns are flat against your head, not sticking up. This is perfect for quick installs, especially with wear and go glueless wigs styles like my burmese curly half wig.
Cornrows (for extra flatness): Braid your hair into 4-6 thin cornrows going straight back. No need for fancy braids—simple is better here! The flatter the base, the more natural your wig will look. I use this for my kinky curly half wig when I want it to sit super close to my scalp.
Step 3: Slap On a Wig Cap—Double Up If You Need To
This is the secret to hiding every single strand of long hair. Grab a nude or black wig cap (match it to your scalp or wig color!) and stretch it over your head, making sure it covers all your buns/braids and hairline. Tuck any flyaways under the cap and pin the edges if needed. If your hair is extra long and thick? Double up on caps—no shame, it just makes the base even smoother. I always double up for my kinky curly half wig—it keeps all my thick hair from peeking through.
Step 4: Put On the Wig & Align the Hairline
Now for the fun part! Grab your wig (whether it’s a full lace, glueless, or half wig like my faves) and place it on your head. Align the ear tabs with your actual ears—this is how you get the perfect fit. Slide the wig back a little so the front sits just in front of your natural hairline (not too far forward, not too far back). I tap the top of the wig a little to make sure it’s secure—no lumps, no bumps, just a smooth fit.
Step 5: Secure It—Glue, Grip, or Bands, Your Call
You don’t need glue if you don’t want it—glueless is my vibe for everyday wear! Here’s how I lock my wig in, even with long hair under:
Wig Grip Band (best for glueless): Slap a velvet wig grip around your head before putting on the wig—it’s non-slip and holds all day, even if I’m running errands or dancing. Perfect for my burmese curly half wig when I’m on the go.
Lace Glue (for special occasions): If I’m going out and want it to stay all night, I apply a thin layer of lace glue to my hairline, wait for it to get tacky, and press the wig’s lace into it. Wipe off any excess glue with a makeup remover wipe—no messy edges here!
Adjustable Elastic Bands: Most wigs have these built-in—just tighten the bands at the back for a snug fit. Super easy, zero mess.
Step 6: Final Touches—Melt the Lace & Style the Edges
This is where you make the wig look yours. A little effort here goes a long way:
Melt the lace: Use a small brush with concealer or foundation to color the lace parting (match it to your scalp!)—this blurs the line between wig and skin. If it’s a lace front, use a hair dryer on low heat to “melt” the lace into your skin—chef’s kiss for a natural look.
Edge control magic: Grab a little edge control and a toothbrush, and style your baby hairs. Swoop ’em, curve ’em, or keep ’em sleek—whatever fits your vibe. I always do a little swoop for my kinky curly half wig—it adds a little extra slay.
Fluff the wig: Run your fingers through the wig to loosen the curls (especially for my curly half wigs!)—don’t brush curly wigs, just finger comb ’em to keep the texture intact.
That’s It—You’re Ready to Slay!
See? Putting on a wig with long hair isn’t rocket science—it’s just about prepping your hair right and taking a minute to align everything. I used to spend 45 minutes stressing over my long hair, making a mess of my wigs, and ending up with a lumpy install. Now? I can do this whole process in 10-15 minutes flat, and my kinky curly half wig and burmese curly half wig look like they’re growing right out of my scalp.
The best part? Long hair doesn’t have to limit your wig game—if anything, it just means you have a perfect base to slay any style you want. Whether you’re rocking a half wig, a full lace, or a wear-and-go style, these steps work for all of ’em. No more hiding your long hair, no more bad wig days—just flawless slays, every single time.
Now go grab your favorite wig, prep that long hair, and step out there with confidence—you look amazing, queen, and nobody’s gonna know it’s a wig. Trust me, I’ve been rocking this hack for months, and not a single person has clocked my installs. That’s the wig magic, baby!
Share this post
Naijanetwork Forum Statistics
Threads: 36819,
Posts: 47174,
Members: 20075